In this post I will show you how to quickly get AWX up and running, this is a very basic deployment there are many ways to get this running and also many options and custom attributes that can be added. I will post all the links I used to build this guide at the bottom so you can see for yourself what they are. I will be posting a video as well for the more visual learners.
1. Static IP Setup
We will start by setting up our Rocky host if you did not set a static IP during install you can use the nmtui to change that within the cli by issuing the nmtui command
$ nmtui
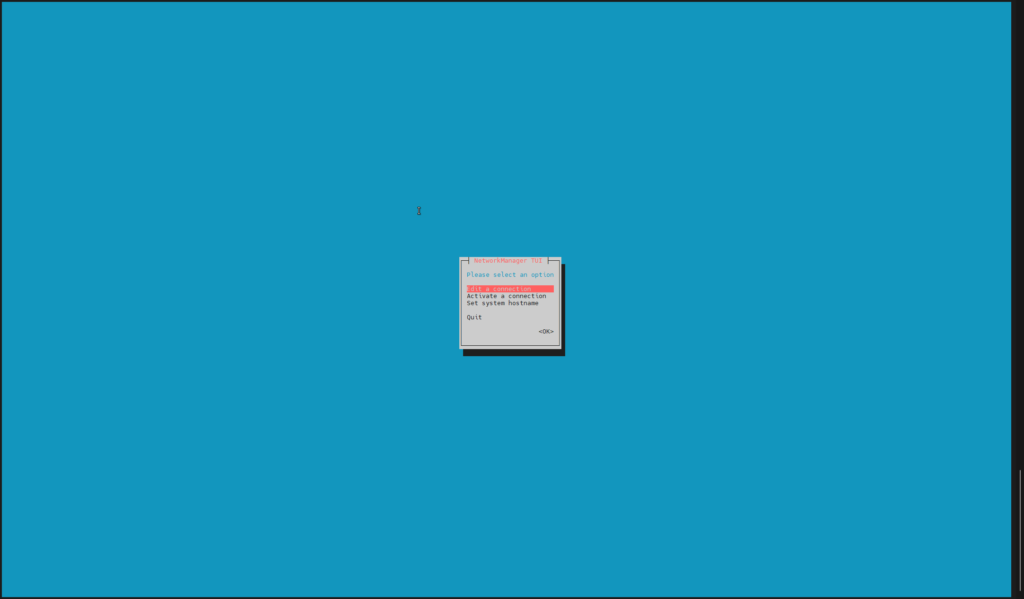
Select Edit a connection then choose your adapter, yours may be different

You will be taken to this screen
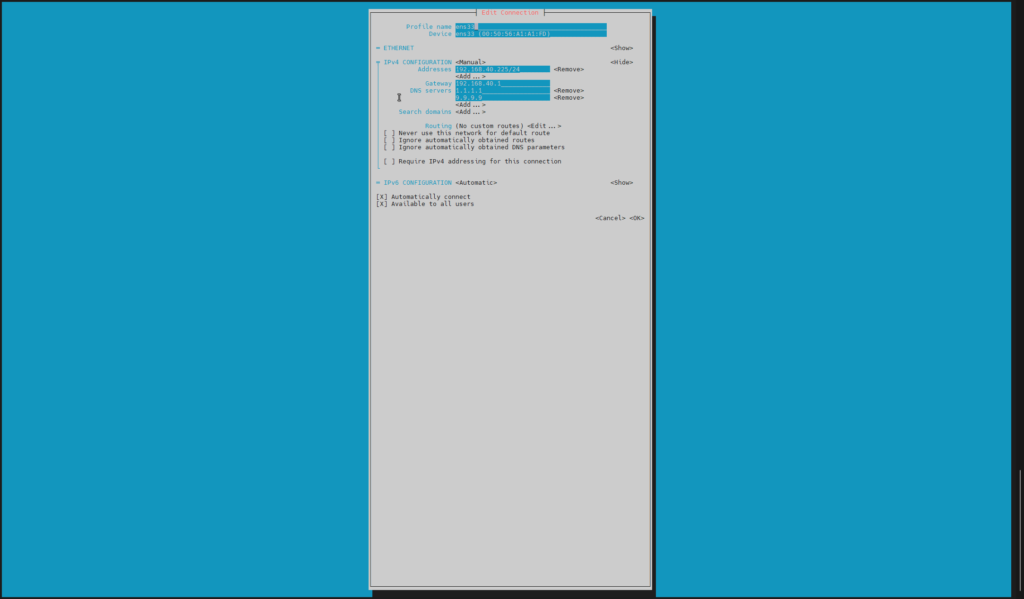
Change IPv4 configuration to <Manual>, put in your address, gateway, and dns servers. Everything else can stay default. Once complete select <Ok> and then press ESC on your keyboard to get back to the main menu where you can set your hostname if you like. I will also show you how to do that from the CLI.
2. Manually Change Hostname
To change the hostname of your awx machine from the CLI use the following command, this is important if you are going to be accessing from other machines or using certificates on AWX which is always recommended. You will also need to add this to your dns server/hosts file of the machine you will be accessing AWX from
$ sudo hostnamectl set-hostname HOSTNAME OF YOUR CHOOSING
Then I like to edit the /etc/hosts file to reflect the change, do so by running and changing it to the hostname you set above and you can remove the ::1 which is IPV6 unless you are using that
$ sudo vi /etc/hosts
127.0.0.1 HOSTNAME OF YOUR CHOOSING
Once changed write and quit VIM, then restart the hostname service with
$ sudo systemctl restart systemd-hostnamed.service
3. Update Rocky
Next step will be to ensure your host is up to date,
$ sudo dnf update
4. Disable Firewall
Then disable the firewalld service and reboot once its done, if you want to keep the firewall you will need to add the correct ports and protocols which I am not covering in this post this is recommended by K3s
$ sudo systemctl disable firewalld --now
$ sudo reboot
Check to see if the service is disabled
$ systemctl status firewalld.service
You should see this, we are ready to continue

5. Install Kubernetes
Now we can begin the AWX install, first install Kubernetes with this command, it will run a script and install a standalone kubernetes single node cluster on your host. More info here Quick-Start Guide | K3s
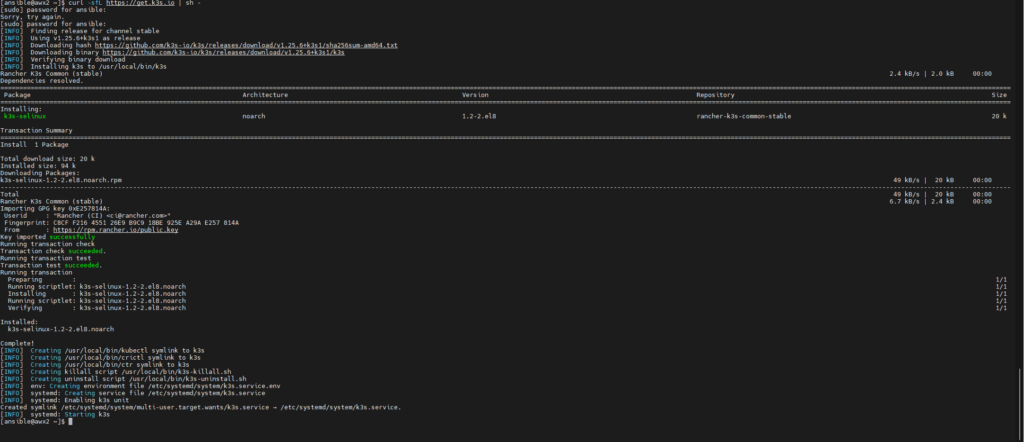
$ curl -sfL https://get.k3s.io | sh -
This is the output we are expecting,
We need to modify the /etc/rancher/k3s/k3s.yaml to allow us to run commands against the cluster, if you do not you will have permission denied errors there is a few ways to do this, I will only show the way I do it. This will give us read permissions to the file allowing you to run the necessary commands
$ sudo chmod 644 /etc/rancher/k3s/k3s.yaml
We will now ensure the k3s cluster is running using kubectl commands,
$ kubectl get nodes
This shows our host, the status, what roles it is running, how long its been up and the version

We are now ready to begin the AWX portion
6. AWX install
First step is to install GIT, if you are not sure what GIT is here is the link Git (git-scm.com)
$ sudo dnf install git -y
It will install all the necessary packages/dependencies for GIT allow you to clone the AWX repository as well as using it for source control of your playbooks and files going forward, which is best practice.
Next we need to install Kustomize, which will allow use to deploy the awx containers to our k3s cluster.
$ curl -s "https://raw.githubusercontent.com/kubernetes-sigs/kustomize/master/hack/install_kustomize.sh" | bash
Once the install is complete, we need to move the application to our /usr/local/bin/ so we can run the application from anywhere in the cli
$ sudo mv kustomize /usr/local/bin/
Now we need to create a couple files to build our containers and deploy them to our kubernetes cluster, first one is call kustomization.yaml
$ vi kustomization.yaml
Put this in the file, there is 2 sections that can be changed as you see by the comments in the file. It is the version of AWX which at the time of writing, latest is 1.1.4 that can be found on the AWX github page under tags. You can also add much more to this file but that is beyond the scope of this article, I will be making further ones with options like applying certs and other settings in the future
apiVersion: kustomize.config.k8s.io/v1beta1

kind: Kustomization

resources:

  # Find the latest tag here: https://github.com/ansible/awx-operator/releases

  - github.com/ansible/awx-operator/config/default?ref=1.1.4 # Change to whatever version you want to deploy - 1.1.4 latest at time of writting

# Set the image tags to match the git version from above

images:

  - name: quay.io/ansible/awx-operator

    newTag: 1.1.4 # Change to whatever version you want to deploy - 1.1.4 latest at time of writting

# Specify a custom namespace in which to install AWX

namespace: awx
Save the file and quit VIM, now we will run the initial deploy with the following command
$ kustomize build . | kubectl apply -f -
This will deploy the required elements as well as setup a namespace AWX so any commands you run from now on in regards to this will need to have the namespace appended with -n awx
Here is the output of the above command

We can check out pods with,
$ kubectl get pod -n awx
once you see the ready 2/2 and status running we are good to continue
Now we will create our second file which is the awx.yaml this will house the instructions for kustomize to deploy the awx instance
$ vi awx.yaml
paste this in, there is other options that can be added to this file but above the scope of this article, will create future articles on that
---

apiVersion: awx.ansible.com/v1beta1

kind: AWX

metadata:

  name: awx # This can be whatever you want to name it, if you are deploying multiple instances each should be unique

spec:

  service_type: nodeport
Now we can save and exit VIM, we need to add a line to the kustomization.yaml we created earlier under the resources: section
...

resources:

  - github.com/ansible/awx-operator/config/default?ref=<tag>

  # Add this extra line below:

  - awx.yaml

...
Now run kustomize again to create the AWX instance, this can take a few minutes depending on the resources of the machine/vm you are deploying it on
$ kustomize build . | kubectl apply -f -
Now I like to open a second ssh session and view the progress with the following command, you can run it from the same session if you prefer
$ kubectl logs -f deployments/awx-operator-controller-manager -c awx-manager -n awx
Once complete you will see this from the above command

Ensure there is no failed or unreachable, that means something did not work, we now need to get the password to login that was generated during deploy with this command
$ kubectl get secret awx-admin-password -o jsonpath="{.data.password}" -n awx | base64 --decode ; echo
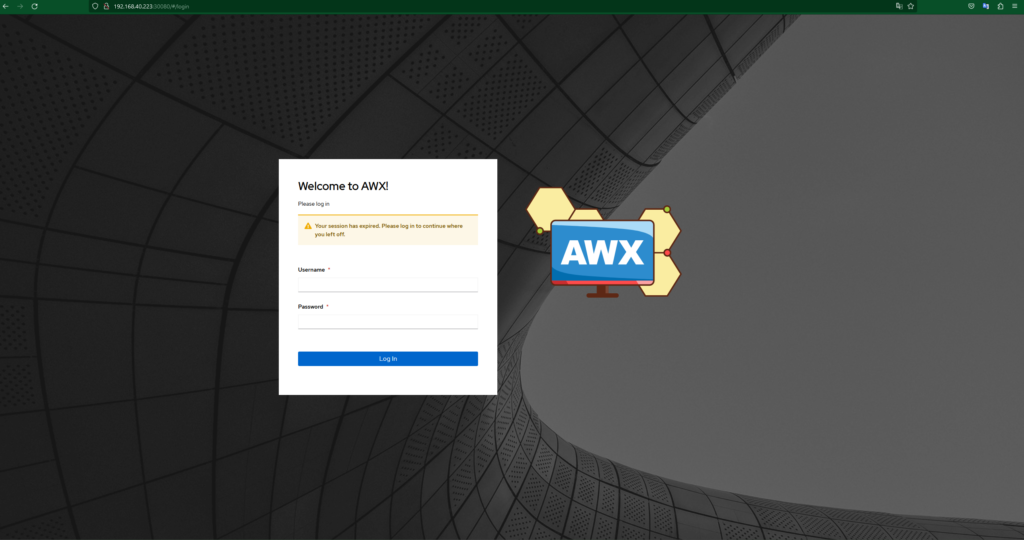
it will spit out a random set of characters that is the password to login, navigate to the ip and port to access awx
Default username is admin and password is the one you got from above
That is it we have successfully deployed AWX pat yourself on the back, I will do my best to get out some subsequent articles on adding certificates and redirect to https as well as some custom deployment options like setting the password et cetera…